Hexo+Github搭建个人博客

写在前面

本文作为教程不够详细。主要是为了让自己快速回忆起当时是如何使用Hexo搭建个人博客的。

参考链接

官方文档 | Hexo英文文档:https://hexo.io/docs/

教程分享 | Hexo博客搭建(1)——建站及部署:https://hwame.top/20200520/hello-hexo-setup-deploy.html

教程分享 | Hexo博客搭建(2)——主题配置:https://hwame.top/20200520/hello-hexo-configuration.html

教程分享 | Hexo博客搭建(3)——优化评论系统:https://hwame.top/20200520/hello-hexo-optimization.html

教程分享 | Hexo博客搭建(4)——常见问题:https://hwame.top/20200520/hello-hexo-troubleshooting.html

教程分享 | Hexo博客搭建(1)(2)(3)(4):https://hwame.top/categories/Hexo/

Hexo是什么?

  • Hexo是一个博客框架,使用这种框架可以简单快速地搭建个人博客。
  • Hexo搭建的方式是将你编写好的文章(Markdown格式的文章)自动解析成网页。
  • 所以,只要你会用 Markdown 写文章,再掌握一些Hexo的使用方法,就能搭建好个人博客。

目标1:使用Hexo搭建一个最简单的博客

为了达成这个目标,你需要:

  1. 安装Hexo
  2. 初始化Hexo
  3. 生成静态文件
  4. 启动本地服务器

安装Hexo

在安装Hexo前必须:

  • 安装Node.js
  • 安装Git

安装Node.js

进入官网下载页面(https://nodejs.org/zh-cn/download ),下载.msi安装程序,双击进行安装。

image-20251211022505602

检查电脑是否安装了Node.js:

1
$ node -v

例:

1
2
C:\Users\92047>node -v
v20.12.2 # 如果已安装,命令行会显示当前安装的 Node.js 版本号

注:如果电脑里的Node.js版本太低,想更新成最新的,那不用卸载掉原来的,直接从官网下载最新的.msi程序进行安装就可以了。

npm

npm (Node Package Manager) 是 Node.js 的包管理器,用于安装、管理和共享代码包。

npm install 命令主要用于安装项目所需的依赖包。

npm install <package-name>命令用于安装指定的软件包。

npm list命令(简写为npm ls)主要用于显示当前项目或全局环境下已安装的包及其依赖关系,通常以树状结构呈现。

安装Git

检查电脑是否安装了Git:

1
$ git -v

例:

1
2
C:\Users\92047>git -v
git version 2.42.0.windows.2

安装 Hexo

用 npm 安装 Hexo:

1
$ npm install -g hexo-cli

查看 npm 是否已经安装了某包

1
$ npm list -g <包名>

例:

1
2
3
4
5
6
7
8
C:\Users\92047>npm list -g hexo
C:\Users\92047\AppData\Roaming\npm
`-- (empty)


C:\Users\92047>npm list -g hexo-cli
C:\Users\92047\AppData\Roaming\npm
`-- hexo-cli@4.3.2

检查hexo版本

1
$ hexo -v

例:

1
2
3
4
5
6
7
8
9
10
11
12
13
14
15
16
17
18
19
20
21
22
23
24
25
26
27
C:\Users\92047>hexo -v
hexo-cli: 4.3.2
os: win32 10.0.26200 undefined
node: 20.12.2
acorn: 8.11.3
ada: 2.7.6
ares: 1.27.0
base64: 0.5.2
brotli: 1.1.0
cjs_module_lexer: 1.2.2
cldr: 44.1
icu: 74.2
llhttp: 8.1.2
modules: 115
napi: 9
nghttp2: 1.60.0
nghttp3: 0.7.0
ngtcp2: 0.8.1
openssl: 3.0.13+quic
simdutf: 4.0.8
tz: 2024a
undici: 5.28.4
unicode: 15.1
uv: 1.46.0
uvwasi: 0.0.20
v8: 11.3.244.8-node.19
zlib: 1.3.0.1-motley-40e35a7

初始化网站 / 初始化Hexo

安装 Hexo 后,执行以下命令在目标 <folder> 中初始化 Hexo。

1
2
3
$ hexo init <folder>  
$ cd <folder>
$ npm install

hexo init [folder]命令是“初始化网站”的意思,“初始化”的意思是在指定的[folder]文件夹中git clone一些文件,安装一些依赖包。

初始化后,该项目文件夹<folder> 里的文件如下所示:

1
2
3
4
5
6
7
8
9
10
11
.  
├── _config.yml
├── package.json
├── scaffolds
| ├── draft.md
| ├── page.md
| └── post.md
├── source
| └── _posts
| └── hello-world.md
└── themes

例:我想在D:\Blog>路径下的github_blog项目文件夹进行初始化Hexo,那我的 <folder> 就是github_blog,那hexo init github_blog命令就会新建github_blog文件夹&下载一些文件&安装一些依赖,这个操作称之为“初始化网站”。npm list 命令会列出当前项目安装的所有依赖项。npm install命令用于安装项目所需的依赖包:

image-20251211034527997

1
2
3
4
5
6
7
8
9
10
11
12
13
14
15
16
17
18
19
20
21
22
23
24
25
26
27
28
29
30
31
32
33
34
35
36
37
C:\Users\92047>d:

D:\>cd blog

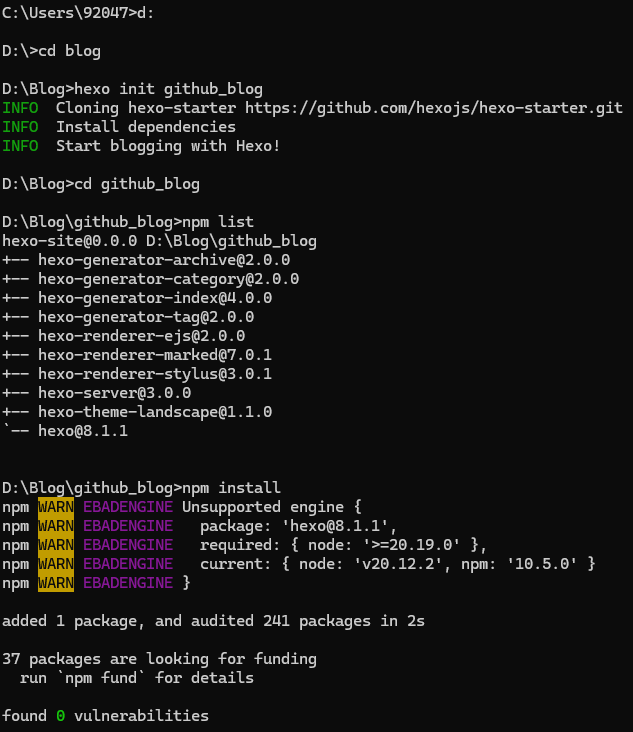
D:\Blog>hexo init github_blog
INFO Cloning hexo-starter https://github.com/hexojs/hexo-starter.git
INFO Install dependencies
INFO Start blogging with Hexo!

D:\Blog>cd github_blog

D:\Blog\github_blog>npm list
hexo-site@0.0.0 D:\Blog\github_blog
+-- hexo-generator-archive@2.0.0
+-- hexo-generator-category@2.0.0
+-- hexo-generator-index@4.0.0
+-- hexo-generator-tag@2.0.0
+-- hexo-renderer-ejs@2.0.0
+-- hexo-renderer-marked@7.0.1
+-- hexo-renderer-stylus@3.0.1
+-- hexo-server@3.0.0
+-- hexo-theme-landscape@1.1.0
`-- hexo@8.1.1

D:\Blog\github_blog>npm install
npm WARN EBADENGINE Unsupported engine {
npm WARN EBADENGINE package: 'hexo@8.1.1',
npm WARN EBADENGINE required: { node: '>=20.19.0' },
npm WARN EBADENGINE current: { node: 'v20.12.2', npm: '10.5.0' }
npm WARN EBADENGINE }

added 1 package, and audited 241 packages in 2s

37 packages are looking for funding
run `npm fund` for details

found 0 vulnerabilitie

这个警告信息 npm WARN EBADENGINE 表示当前电脑的 Node.js 版本与您尝试安装的 hexo所要求的版本不兼容。我的 Node.js 版本(v20.12.2)低于 Hexo 所要求的最低版本(>=20.19.0),需要升级Node.js 版本,那就去官网下载一个新的.msi安装包然后安装就好。

image-20251211034554295

1
2
3
4
5
6
7
8
9
10
11
12
13
14
15
16
17
18
19
20
21
22
23
24
D:\Blog\github_blog>node -v
v24.11.1

D:\Blog\github_blog>npm install

up to date, audited 241 packages in 10s

37 packages are looking for funding
run `npm fund` for details

found 0 vulnerabilities

D:\Blog\github_blog>npm list
hexo-site@0.0.0 D:\Blog\github_blog
+-- hexo-generator-archive@2.0.0
+-- hexo-generator-category@2.0.0
+-- hexo-generator-index@4.0.0
+-- hexo-generator-tag@2.0.0
+-- hexo-renderer-ejs@2.0.0
+-- hexo-renderer-marked@7.0.1
+-- hexo-renderer-stylus@3.0.1
+-- hexo-server@3.0.0
+-- hexo-theme-landscape@1.1.0
`-- hexo@8.1.1

升级好 Node.js 版本再次安装,发现项目依赖包前后并没区别,也就是执行不执行npm install并没有改变项目的依赖包。这可能是因为在执行hexo init 命令时内部已经自动执行了一次npm install(有这样一条“INFO Install dependen”信息显示),此时已经完成了依赖的安装,虽然此时有版本兼容性问题但不影响包的安装。后面手动的第二次执行npm install的作用倒相当于是一种环境兼容性验证和修复了。

文件说明

github_blog文件夹里的文件说明:

_config.yml

网站的配置文件。

1
2
3
4
5
6
7
8
9
10
11
12
13
14
15
16
17
18
19
20
21
22
23
24
25
26
27
28
29
30
31
32
33
34
35
36
37
38
39
40
41
42
43
44
45
46
47
48
49
50
51
52
53
54
55
56
57
58
59
60
61
62
63
64
65
66
67
68
69
70
71
72
73
74
75
76
77
78
79
80
81
82
83
84
85
86
87
88
89
90
91
92
93
94
95
96
97
98
99
100
101
102
103
104
105
# Hexo Configuration
## Docs: https://hexo.io/docs/configuration.html
## Source: https://github.com/hexojs/hexo/

# Site
title: Hexo
subtitle: ''
description: ''
keywords:
author: John Doe
language: en
timezone: ''

# URL
## Set your site url here. For example, if you use GitHub Page, set url as 'https://username.github.io/project'
url: http://example.com
permalink: :year/:month/:day/:title/
permalink_defaults:
pretty_urls:
trailing_index: true # Set to false to remove trailing 'index.html' from permalinks
trailing_html: true # Set to false to remove trailing '.html' from permalinks
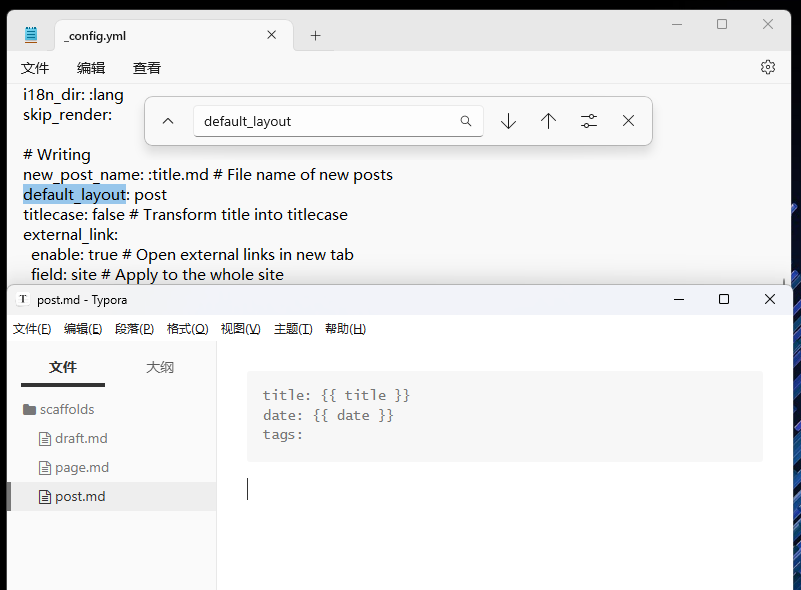
# Directory
source_dir: source
public_dir: public
tag_dir: tags
archive_dir: archives
category_dir: categories
code_dir: downloads/code
i18n_dir: :lang
skip_render:

# Writing
new_post_name: :title.md # File name of new posts
default_layout: post
titlecase: false # Transform title into titlecase
external_link:
enable: true # Open external links in new tab
field: site # Apply to the whole site
exclude: ''
filename_case: 0
render_drafts: false
post_asset_folder: false
relative_link: false
future: true
syntax_highlighter: highlight.js
highlight:
line_number: true
auto_detect: false
tab_replace: ''
wrap: true
hljs: false
prismjs:
preprocess: true
line_number: true
tab_replace: ''

# Home page setting
# path: Root path for your blogs index page. (default = '')
# per_page: Posts displayed per page. (0 = disable pagination)
# order_by: Posts order. (Order by date descending by default)
index_generator:
path: ''
per_page: 10
order_by: -date

# Category & Tag
default_category: uncategorized
category_map:
tag_map:

# Metadata elements
## https://developer.mozilla.org/en-US/docs/Web/HTML/Element/meta
meta_generator: true

# Date / Time format
## Hexo uses Moment.js to parse and display date
## You can customize the date format as defined in
## http://momentjs.com/docs/#/displaying/format/
date_format: YYYY-MM-DD
time_format: HH:mm:ss
## updated_option supports 'mtime', 'date', 'empty'
updated_option: 'mtime'

# Pagination
## Set per_page to 0 to disable pagination
per_page: 10
pagination_dir: page

# Include / Exclude file(s)
## include:/exclude: options only apply to the 'source/' folder
include:
exclude:
ignore:

# Extensions
## Plugins: https://hexo.io/plugins/
## Themes: https://hexo.io/themes/
theme: landscape

# Deployment
## Docs: https://hexo.io/docs/one-command-deployment
deploy:
type: ''

package.json

应用程序的信息。

scaffolds

脚手架文件夹。 当你创建新文章时,Hexo 会根据脚手架来新建。可以理解为“写作模板”。

source

资源文件夹。 这里是你放置网站内容的地方。Hexo 忽略隐藏文件以及名字前带有 _(下划线)的文件夹或文件——除了 _posts 文件夹。可渲染的文件(如 Markdown、HTML)会被处理并放入公共文件夹,而其他文件则会被复制。

themes

主题文件夹。Hexo 通过将网站内容与主题结合来生成静态网站。

生成静态文件

1
hexo generate

或简写为

1
hexo g

例:

image-20251211040025907

1
2
3
4
5
6
7
8
9
10
11
12
13
14
15
16
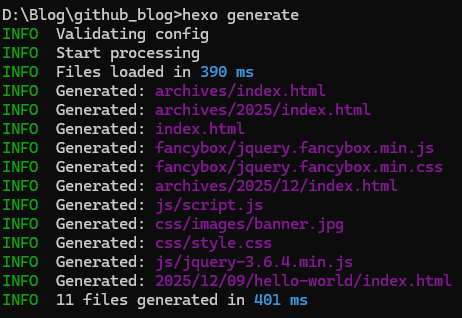
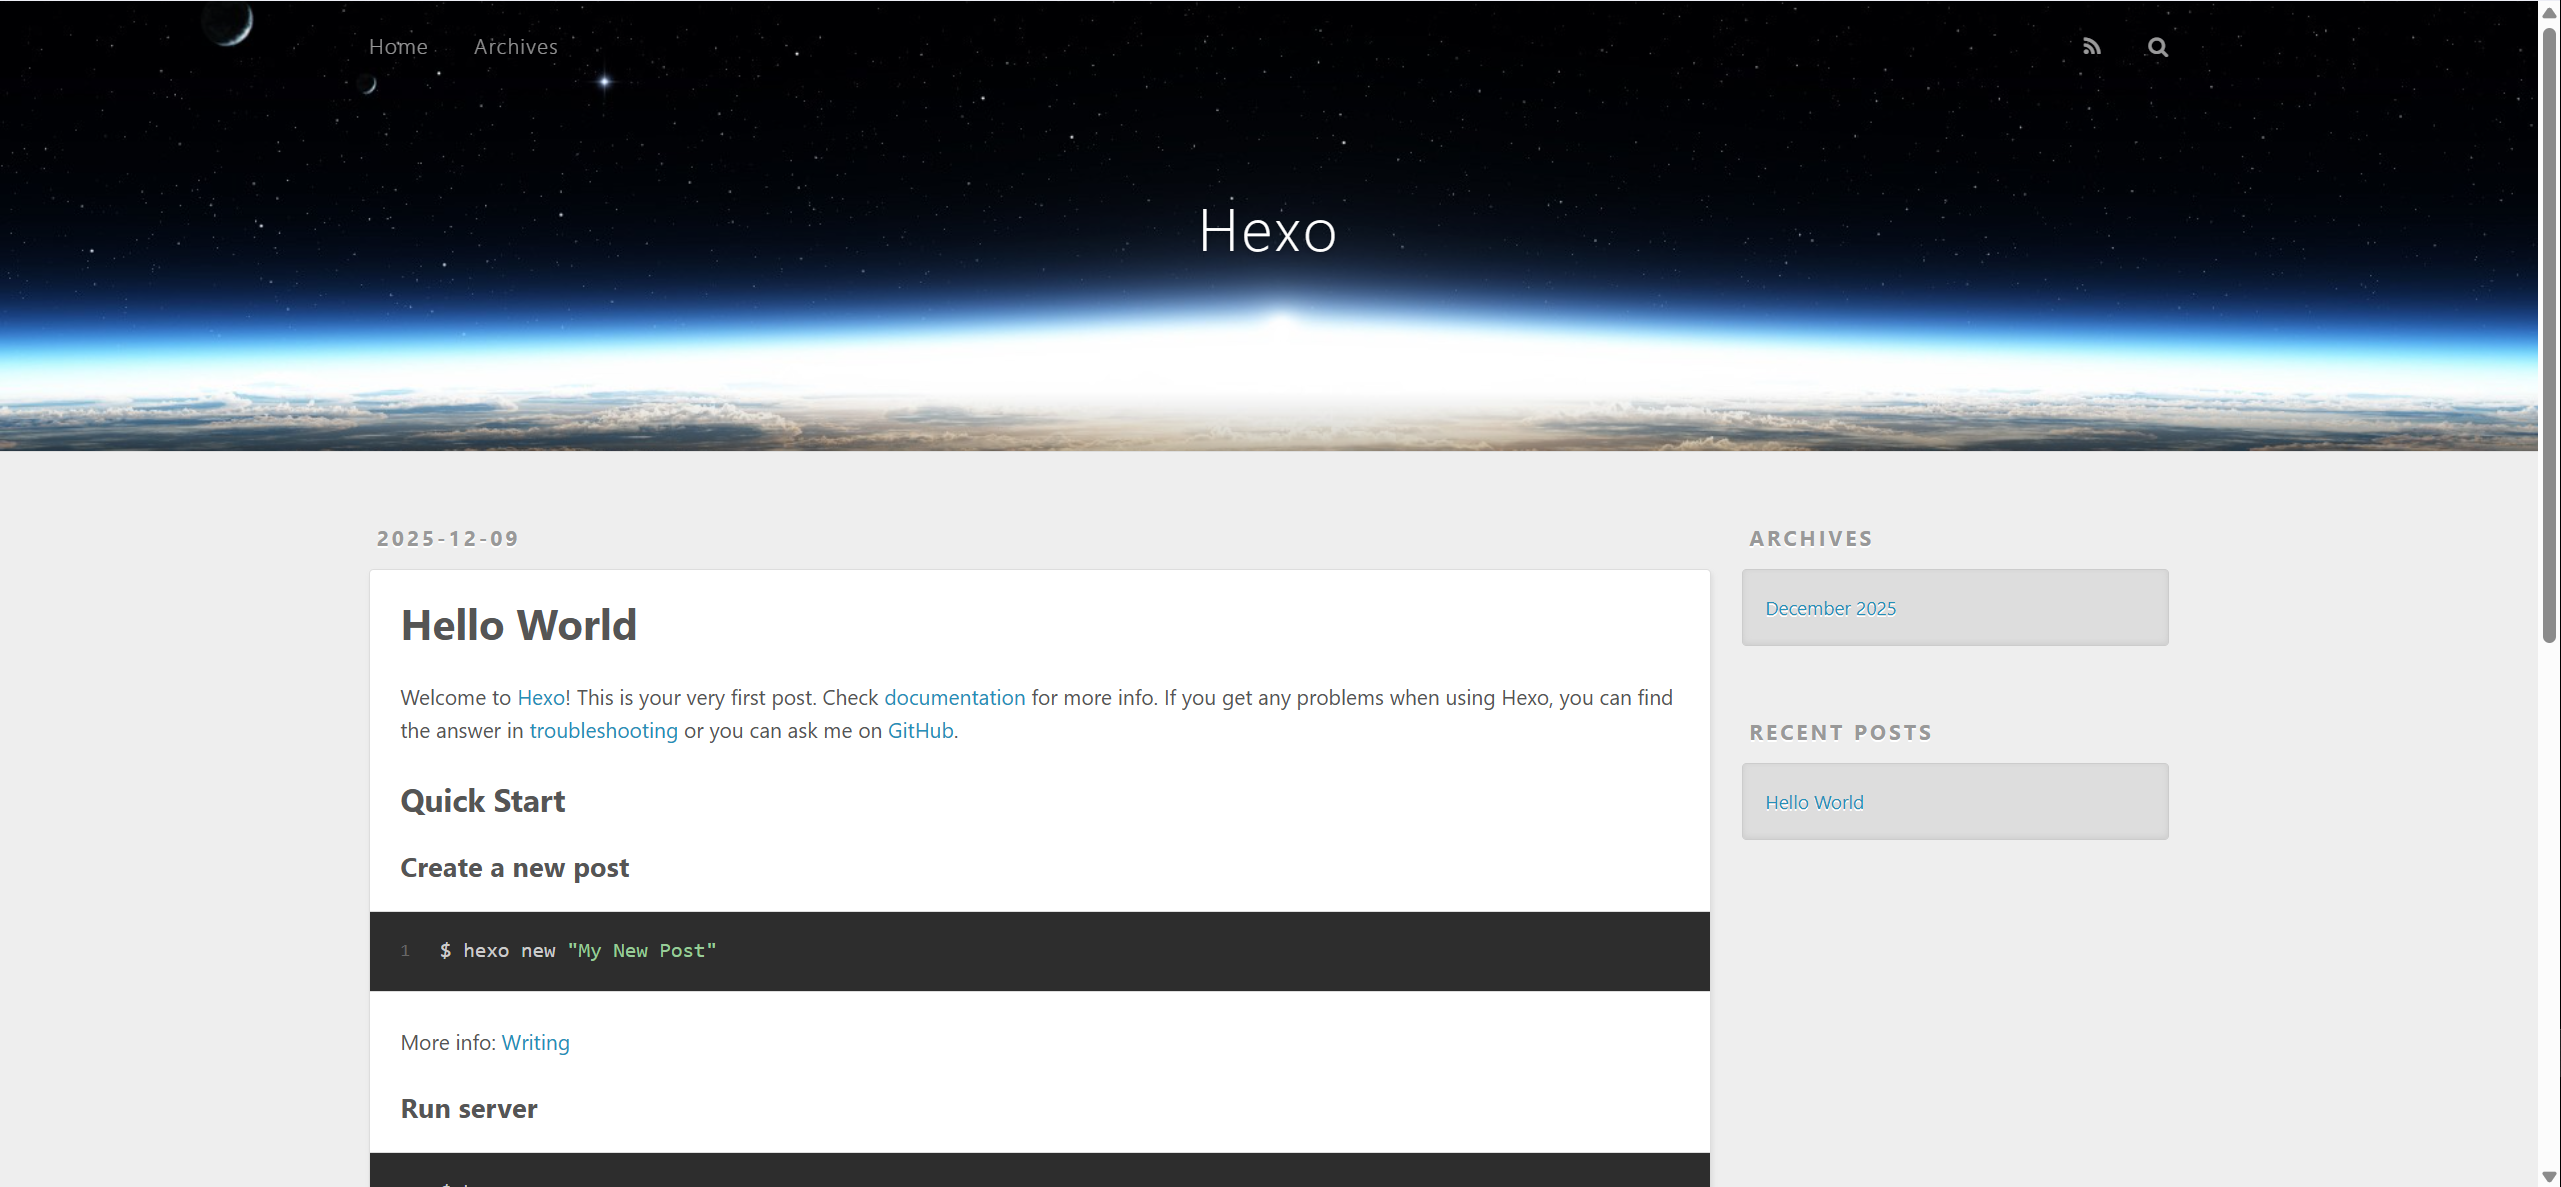
D:\Blog\github_blog>hexo generate
INFO Validating config
INFO Start processing
INFO Files loaded in 390 ms
INFO Generated: archives/index.html
INFO Generated: archives/2025/index.html
INFO Generated: index.html
INFO Generated: fancybox/jquery.fancybox.min.js
INFO Generated: fancybox/jquery.fancybox.min.css
INFO Generated: archives/2025/12/index.html
INFO Generated: js/script.js
INFO Generated: css/images/banner.jpg
INFO Generated: css/style.css
INFO Generated: js/jquery-3.6.4.min.js
INFO Generated: 2025/12/09/hello-world/index.html
INFO 11 files generated in 401 ms

启动本地服务器

1
$ hexo server

或简写为

1
$ hexo s

默认情况下,访问网址为: http://localhost:4000/。

例:

image-20251211040045270

1
2
3
4
D:\Blog\github_blog>hexo server
INFO Validating config
INFO Start processing
INFO Hexo is running at http://localhost:4000/ . Press Ctrl+C to stop.

image-20251210002202

停止服务

按 Ctrl + C 停止服务

目标2:写篇文章,更新博客

使用hexo指令创建一篇新文章

1
$ hexo new [layout] <title>

新建一篇文章。如果没有设置 layout 的话,默认使用 _config.yml 中的 default_layout 参数代替。 这里的默认布局是post,查看post.md可以看到文章的布局。

image-20251210002501

例:新建了一篇名为”Hexo+Github搭建个人博客”的markdown文件,该文件自动存放在D:\Blog\github_blog\source\_posts路径下,当前内容是空的,可以从这个路径下找到这个文章填写内容。然后重新启动服务,就可以在http://localhost:4000/看到我们的博客多出了一篇文章。

1
2
3
4
5
6
7
8
9
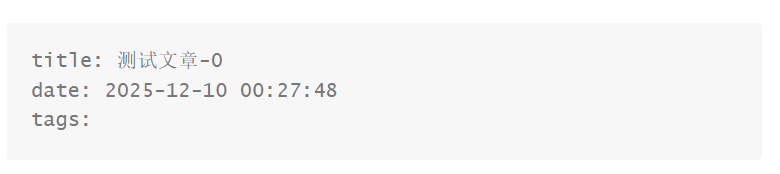
D:\Blog\github_blog>hexo new "Hexo+Github搭建个人博客"
INFO Validating config
INFO Created: D:\Blog\github_blog\source\_posts\Hexo+Github搭建个人博客.md

D:\Blog\github_blog>hexo s
INFO Validating config
INFO Start processing
INFO Hexo is running at http://localhost:4000/ . Press Ctrl+C to stop.
INFO See you again

由于使用的是post布局,markdown文章里的date是在创建文章时自动填充的:

image-20251211041007501

目标3:主题配置

pure主题中文文档:https://github.com/cofess/hexo-theme-pure/blob/master/README.cn.md

目标4:将本地博客部署到Github

初始化Git

1
2
3
4
5
6
$ git config --global user.name <username>
$ git config --global user.email <email>

# 检查
$ git config user.name
$ git config user.email

配置SSH密钥

本地创建SSH公私钥

1
$ ssh-keygen -t ed25519 -C "your_email@example.com"

image-20251211043057258

在路径C:\Users\<Administrator>\.ssh下有这样一些文件:

image-20251211043146904

id_ed25519是私钥,id_ed25519.pub是公钥。

在Github设置中添加SSH公钥

设置界面:https://github.com/settings/keys

Github认证文档:https://docs.github.com/en/authentication

本地SSH连接Github

1
$ ssh -T git@github.com

若连接成功,例:

1
2
D:\Blog\github_blog>ssh -T git@github.com
Hi [你的Github用户名]! You've successfully authenticated, but GitHub does not provide shell access.

若连接失败,例:

1
2
D:\Blog\github_blog>ssh -T git@github.com
git@github.com: Permission denied (publickey).

则可以把之前的连接记录删掉:

1
2
3
4
D:\Blog\github_blog>ssh-keygen -R github.com
# Host github.com found: line 8
C:\Users\92047/.ssh/known_hosts updated.
Original contents retained as C:\Users\92047/.ssh/known_hosts.old

如果您确信某个服务器(例如 GitHub)的公钥发生了变化,并且您想重新记录它,您可以使用 ssh-keygen 命令删除特定的行

  1. 确定主机名: 在您的 GitHub 错误案例中,主机名是 github.com

  2. 执行删除命令:

    1
    ssh-keygen -R github.com
    • -R 标志表示从 known_hosts 文件中移除指定的主机名。

    • 效果: 下次您连接 github.com 时,系统会像第一次连接一样,要求您确认该服务器的公钥指纹。

部署网站

_config.yml文件最后修改成:

1
2
3
4
deploy:
type: git
repository: https://github.com/username/username.github.io.git
branch: main

安装该Git部署插件才能使用hexo deploy命令

1
$ npm install hexo-deployer-git --save

部署

1
hexo clean && hexo g && hexo d

image-20251211050240086

后面省略,直到看到最后一行是INFO Deploy done: git表示部署成功。

遇到问题:Hexo插入图片失败

解决方案:https://github.com/yiyungent/hexo-asset-img

由于我的hexo版本 >= hexo v7,所以安装1.2.0的依赖:

1
$ npm install hexo-asset-img@1.2.0 --save

image-20251211062303825

并在_config.yml里找到post_asset_folder那部分,将其改为

1
2
3
4
5
post_asset_folder: true
marked:
prependRoot: true
postAsset: true
relative_link: false

之后再重新启动本地服务器查看插入图片是否成功

1
hexo clean && hexo g && hexo s

image-20251211062334308

image-20251211062937919

注意:实测图片名不要有空格,不然部署到github上也不会显示。比如图片名字可以是“image-20251210002202.png”,但不能是“image 20251210002202.png”。